Just in time for Halloween: Miniature Psycho Movie House in 1:24 Scale Tutorial

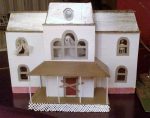
I tried to design a budget-friendly Halloween diorama for my workplace cubicle decorating contest, and came up with this tutorial for creating a replica of the house in the movie Psycho. I have always loved that house with it’s second-empire architecture, and grand cathedral window on the front. I also added a cemetery on the side with dead trees and gravestones made from polymer clay, but this tutorial is only about the house. The house in my pictures is actually 4” wider than the following instructions will create. I designed mine to fill up my cubicle space, but after I got it together, I decided it would look better if the main part of the house wasn’t as wide. I adjusted the measurements to make the entire house 14” wide by 14” high by 6” deep. In real scale this would be 28’ x 28’ x 12’, but the actual movie house had another two-story addition on the back. This house is more of a “façade”. I never remember to track the time it takes me to build miniature projects, but I’d say I invested about 10 hours over the period of several days to build this.

The Halloween diorama above my work cubicle.

What you need:

  • Corrugated cardboard – break down a large shipping box
  • Thin cardboard (like the backer of a writing pad)
  • Hobby/Craft/Xacto knife with sharp blade
  • Straight edge ruler and tape measure
  • Paints (latex or acrylic in greys and browns)
  • Cardstock and paper cutter, or precut quilling paper 1/8” and ½” wide, for the lattice and siding
  • Tacky Glue
  • Masking tape for holding glued parts together temporarily
  • Wooden coffee stir-sticks and bamboo skewers
  • Clear plastic packaging or old overhead projector transparency film for windows
  • Wire edged white lace ribbon or gauzy fabric for curtains

Cutting out all the pieces is half the battle, and the most time-consuming part of this tutorial. Please be careful when using the knife. Cut-proof gloves are recommended. Carefully cut the following pieces from corrugated cardboard with your Xacto knife. Draw them out first with a pencil and straight edge, then cut along the lines using ruler again.

Roof – These are trapezoids, not rectangles, with either one or both “ends” cut at an angle, with the base being longer than the top side.

  • Main house sides: (2) 4” H x 6” base x 4” top (center top and base so side angles are equal)
  • Main house front: (1) 4” H x 14” base x 12” top (center top and base so side angles are equal)
  • Foyer sides: (2) 4” H x 3” base x 2” top (center top and base so side angles are equal)
  • Foyer front: (1) 4” H x 6” base x 5” top (center top and base so side angles are equal)
  • Porch sides: (2) 4” H x 5” base x 3” top (line up top and base at one end so angle is only at other end)
  • Porch front: (1) 4” H x 10” base x 6” top (center top and base so side angles are equal)

Floors – Rectangles

  • First and Second: (2) 6” x 14” (cut slightly smaller as needed to fit inside walls)
  • Attic: 6 ½” x 14 ½”
  • Roof Top: 6 ½” x 12 ½”
  • Foyer Second: 6” x 3” (cut slightly smaller as needed to fit inside walls)
  • Foyer Attic: 6 ½” x 3 ½”
  • Foyer Roof: 5 ½” x 2 ½”
  • Porch (also foyer’s first floor): 10” x 5”

Support pieces – Rectangles

  • Inside room divider walls (remember to cut doorways in these with your door template, or large archways if desired. Make at least 1 per floor, to give the house stability): 6” x 4” (cut slightly smaller as needed to fit).
  • Porch supports: 10” x 1” and (2) 5” x 1”
  • Crawl-space supports: (2) 6” x 1” (cut slightly smaller as needed to fit)

Templates to cut window/door openings in walls

  • Door opening: 3 ¼” x 1 ½” (trace and cut from template)
  • Window openings: 2 ¼” x 1 ¼” (trace and cut from template)

Print out the provided template document on 8.5” x 11” cardstock, and then cut out the pieces with scissors. Trace these on thin cardboard, making 8 regular windows, one cathedral window, one small oval window and one door frame. Then cut these out using a combination of hobby knife & ruler, and sharp scissors. The door and window opening templates are used in the next step, and don’t need to be traced onto cardboard, as the cardstock itself can be used as a template. As indicated, you want to trace the door and window opening templates inside the border, and the other pieces along the border. This is so that the trim pieces don’t end up being too narrow to cover the window openings, or said another way, so the openings don’t end up too wide to be covered by the trim.

Lay your wall pieces flat to trace and cut out the window and door openings. I don’t have exact measurements for placement, as I “eyeballed-it” on mine. On the house sides, try to put them in the middle for side-to-side spacing. The bottom 1” is the house crawl-space/basement, so locate the window about 1.75” from the bottom. Remember that inside the first floor ends approximately 5” up (including crawl-space), so the second story window should be about 5.75” inches from the bottom. I’d recommend putting the windows no more than 1.5” in from the outer walls in the front, or your porch roof may stick out over the window. At this time, also cut the oval for the window in the foyer roof front.

On the foyer front, put the door opening centered in the middle, and about ¼” from the bottom, leaving a small “threshold”. I saved the bottom 2.5” rectangle of the door cutout, and trimmed it down just a bit to be the actual door. I added cloth “hinges” on the back side, so that the door could be opened and closed. A round head straight pin was added as a door knob, with a gold seed bead glued on the other end of the pin as the door knob on the other side. I snipped the extra end of the pin off with wire nippers when the glue was dry. The cathedral window should be 5.75” from the bottom. The foyer walls are 1” taller than the main house, plus the porch is the crawl-space under the foyer. In the front of the main house, I cut archways about 5” wide by 3.5” high to allow access from the main house. See the pictures for this step, and line up the front main house and foyer pieces to locate the openings correctly.

Glue your walls and floors together at this point with tacky glue (using the pictures as a guide), temporarily holding them together with masking tape. Remember to glue the first floor 1” from the base of the walls, on the main house, as the first inch is the crawl-space. Put the second floor of the main house at 5” from the bottom. I glued extra strips of corrugated cardboard inside the house to act as supports for the first and second floor. Glue your crawl-space supports inside the main house base. Affix the foyer second floor 4” up, as there is no crawl-space, and that will make it even with the main house second floor. Glue the porch base together. While all that is drying, glue your main house roof pieces to the attic floor, and roof to the top. Affix foyer roof pieces to the foyer attic floor, and room to the top. Don’t glue these to the house yet, because painting is much easier before you put it all together. You could also add roof fencing detail, which is something I didn’t have time to do, but may add later.

Glue supports under the base of the main house.
Interior walls add support to the entire structure. Notice the creepy old photos I printed and framed hanging on the walls.
Interior of the foyer showing floor supports glued. I added another piece of cardboard to enclose the top that shows above the main house roof.
Main house and foyer with roof and porch base. Roof is not glued to house yet.

I used leftover latex interior house paint for most of my project, as I was doing this on the cheap. Craft acrylics would also work well. I painted the interior of my house a light gray color, to look like the walls were really a dingy white. The exterior will be painted after the “siding” is applied. The window and door trim will be applied after the siding has been painted.

Lay out all your window and door trim pieces and paint them a nice contrasting color. I used a darker gray, to contrast the medium gray that I planned on painting the exterior.

When dry, glue clear plastic on the back of your window trim as glass windowpane. I left little “broken” spaces on some of them, and left out the cross piece and the whole glass pane on the top left window, so I could make the curtains “flap” outside the window. I got this idea from a photo of someone else’s similar model, so I cannot claim originality. However, it is said that imitation is the sincerest form of flattery.

Trim pieces painted. I started gluing them to the transparency film too. There is a half-moon window above the door too.

After the roof is glued and dried, you can paint it. I painted this brown, and then went back over it with a thin coat of metallic gold acrylic paint. I was going for a copper roof look, and think it turned out pretty well. If you wanted to get really fancy – and expensive – you could glue copper sheeting to your roof. Another roof option would be to cut more paper siding, and then cut vertical tabs every ¼” to look like wood shingles and paint it a light brown. Paint the porch roof pieces at this time too, but don’t glue them yet.

Cut white cardstock into ¼” strips with a paper cutter (or use premade quilling paper). Starting 1” above the base of the house (I did this WRONG in my picture, and had a remove the bottom 1” of siding later), glue each strip of paper horizontally, overlapping the previous piece by 1/8” working your way up. Cut around door and window openings.

Leave the front part of the house that will be covered by the foyer bare, and just paint that later. It will end up being interior wall. Try to leave the very bottom edge of the siding free from glue, and just glue at the top edge. When paint is applied, it will cause the siding to warp and curl a little bit, giving it an aged look. If you DON’T want this effect, glue the siding down completely. Allow the glue to dry thoroughly, prior to painting the house exterior. Paint 6 additional ¼” strips to fold in half lengthwise into a right angle, and glue vertically at each corner of the house as a cap. I also folded pieces in half lengthwise, with painted side in, and put them at the joint between the main house and foyer. I glued them only to the foyer, so that I could keep the two pieces apart, to be easily transported. This is difficult to describe, but maybe you can see it in the picture.

Siding strips are glued to cover the corners and the joints between the foyer and house. Here you can also see the porch roof and supports assembled.

Paint the porch base black and the top brown, or gray if you prefer. After painting the exterior of the house and allowing it to dry, you can glue all the window trim with panes on the walls. You may lue the roof pieces to the house and foyer now too. It is also time to glue the porch roof to the foyer between the first and second floors. Cut pieces of bamboo skewers and paint them, then glue them in place as porch support railings. You can also get fancy by creating porch railing details with toothpicks, but I didn’t have time. I may go back and add that detail next year. Now, print out the half scale brick sheet provided, and cut them into 1” strips to glue on the foundation of the house.

The last step is to cut 1/8” strips of cardstock and glue them at an angle to create the porch base lattice. I used matte mod podge for this, rather than tacky glue, but either would work. You could also paint this on with a steady hand with white paint, but you won’t get the raised detail. You could also just surround the porch base with brick paper, if you wanted, or paint it a solid color.

For the finishing details, I used wood coffee stir sticks that I aged with a vinegar and steel wool solution (find this process easily with an online search), broke off pieces and glued them over the front door with KEEP OUT!!! in black marker. I glued pieces of wire edged lace in the upstairs window and shaped them to look like they are flapping in the wind. White gauzy material soaked in a mixture of white glue and water, squeezed out and formed until dry will also have a similar effect. That is how I made the ghost in the upstairs foyer window, by the way. Of course, that room really needs an empty ½ inch scale rocking chair to be complete. A cotton ball stretched out and clinging to porch corners also adds a creepy, spider-webby, abandoned look to the house.

Go ahead and furnish your house if you want. Add a cemetery or any other creepy accessories. Have fun with this project and make it your own! Thanks for reading my blog. Be sure to come back as I add projects from time to time.

Miniature 1:12 Scale Pink Yard Flamingos for Dollhouse or Fairy Garden

I sell the miniatures I make on my Etsy site, and one of my most popular items is my miniature pink yard flamingos. I can’t keep up with the demand, so they are always selling out.

Miniature 1:12 Scale Pink Yard Flamingos by Thumbwick Miniatures

They are extremely realistic looking and adorable, if I may say so myself. They are also time consuming to make. I know that I am never going to have a business that pays the bills by selling just them. OK, theoretically, I probably could make about 30 an hour, if I really push it, and do that four hours a day, leaving the rest of my time to actually run my business. Then, assuming they all sold, after expenses, I could actually make enough money to comfortably live on. Very soon though, I would get really tired of making tiny yard flamingos. Making a couple dozen is really run and rewarding, but making thousands of them would be torturous.

So, I decided to create a miniature pink yard flamingo kit to also sell on my Etsy site, for crafty, creative people who would also find it fun to make them. This would also make them more affordable for people, because I don’t have to charge for my own time to paint their tiny beaks and eyes, and attach their metal legs. If someone only has to buy the kit and then invest their own time, then there are more practical uses for the tiny flamingos. They become affordable party favors, stocking stuffers and gift toppers. If the paint is sealed with varnish to make them waterproof, then they can even be washed and used as cake and cupcake decorations.

Miniature 1:12 Scale Pink Yard Flamingos Kit makes 12

When I buy a kit, I like everything I need to be included, so I don’t have to run out and buy this or that additional item. I tried to include everything one would need, but to include a pair of scissors or pliers would make the kit too expensive. I also think most people already own those items. I documented the process very thoroughly with pictures to create instructions which I hope are detailed, yet easy to follow.

Painting the tiny flamingo beaks in yellow

If you do happen to buy my kit, please let me know what you think about it. I’m always trying to improve, so feedback is always welcome.


Miniature 1:12 Scale Pink Yard Flamingos – one pink and one hot pink

Thanks for reading!

Margie

Dollhouse Tin Ceiling Tutorial – Made from Items Found at Dollar Tree

This tutorial will detail how to create a tin ceiling in your dollhouse from materials you can find at your local Dollar Tree store. I love shopping there, because everything is just $1, so it makes me feel rich😊 If you don’t have a local Dollar Tree (this store used to be called Everything’s a Dollar, but the name changed a while back), you may have a similar type dollar store, and chances are they have similar items, so check it out.

One thing you may need for this project, which you can’t find at your local dollar store is E6000 glue or 527 multi-purpose cement, which I recommend for certain steps. However, you will still have to tape things in place while they dry, so regular white glue or craft tacky glue will work too. I also used 15 mm silver three flower leaf bead cap jewelry findings for the ceiling light medallion which are not from the Dollar Tree. I found these on an Etsy site (https://www.etsy.com/listing/565810655/15mm-antiqued-bronzegolddull-silverwhite) for even less than a dollar – wohoo!

I decided a long time ago that the kitchen of my Bellingham Farmhouse was going to have wood plank flooring and a tin ceiling. I originally tried to design my own tin ceiling tiles, and emboss the pattern into aluminum sheeting with a stylus. I didn’t end up liking how this looked in the end, so I tore it out. Then I found aluminum cookie sheets at the Dollar Tree, which had a cool pattern, and thought I should try making the ceiling out of those. On a recent vacation from work, I put together a tutorial of the process. Following, are the steps I took to achieve the result in the photo above.

Tools needed:

  • Old scissors for cutting the aluminum (NOT your good sewing shears)
  • Work gloves
  • Ruler/straight edge
  •  Wooden craft stick, stir stick or any stick of desired width for the trim
  • Size 3/8” and 3/4” circle punches, or size needed to fit (optional for ceiling light medallion)
  • Pencil

Materials needed:

  •  Dollar Tree aluminum cookie sheets (pack of 2)
  • Dollar Tree craft glue, regular or tacky or white glue
  • E6000 glue or 527 multi-purpose cement (optional)
  • 15 mm silver three leaf bead caps (optional)
  • Scratch paper
  • Cellophane tape and masking tape (you can also get these at the Dollar Tree)

Steps:

First you need to assess the ceiling area that you want to cover. Does it already have a light, or will a ceiling light be added?


In my case, I already had a light wired, and that wiring was underneath the glass bathroom floor tiles above, which had already been glued down. Bad planning on my part. I decided to work around the light, rather than tear up the bathroom flooring. I measured the ceiling, and made a paper template of it, including marking out where the light fixture was. Because of the light fixture situation, I chose a layout of 4” square ceiling tiles – so I could cut out a little slot to slide one tile around the light fixture wire.

Then I started cutting out 4” by 4” squares from the cookie sheets. This aluminum sheet gets very sharp when it is cut, so it is best to wear a pair of work gloves while cutting and handling it. Unless you prefer to bleed on your project and have bandages on all your fingers… It is very important to keep the pattern in mind. One side is a little shinier that the other. I chose to put that side out, and the duller side towards the ceiling. Cut carefully between the smooth and patterned sections of the aluminum sheet. You can use these smooth sections of the aluminum to make trim pieces. You will also use the pattern around the perimeter to make your coving pieces, so try not to damage that either.

Your pieces will need to fit together, so that the pattern lines up. Start to arrange them on your template. Pay very close attention to the bumps and ridges in your pattern so that one piece doesn’t get turned sideways. It may not be very apparent now, but it will be after you install it, so double check everything. You should have enough metal to cut new pieces if you make a mistake. Remember that you will need to lay your pieces face down on the template, so that they will be correct when you glue them to the ceiling. If you lay the pieces face up, they will be backwards, and if you cut around walls, or light fixtures, those holes will be in the wrong position when you try to install the ceiling. Notice the small notch cut out in the top left side of the center tile, in the photo below. That is for the light fixture wire.

I used cellophane tape to lightly tape the pieces together. I taped the front row together, but not the back rows to the front. This is so I could install the back part of the ceiling first, and then slide the front row around the light, as I installed it. If I made the whole ceiling as one sheet, I would not be able to do this. I used the template as a guide to determine where to cut around the walls.

I laid the back portion inside the room, facing down. This is how it will be when installed, with the “right” side facing down. I applied craft glue to the whole surface, and allowed it to become tacky (about 10 minutes). Then I installed the whole sheet on the ceiling, pressing it in place, and holding it with pieces of masking tape.


Then I tried to patiently wait for that panel to dry before installing the front panel. I am not very good at patiently waiting. I took a trip to the Dollar Tree to avoid the temptation of trying to glue the next panel too soon. I found some Reindeer Moss, which I love to use in miniature dried floral arrangements. It has such a nice earthy aroma, and interesting branching. They don’t usually have that in stock, so I got three bags. I also picked up some floral moss that looked like it might be good for making HO scale model railroad trees and shrubs. My husband has a very large layout that he works on all the time. When I showed him the floral moss, he loved it.

I installed the front panel the same as the back one, sliding the notch around the light fixture wire. Then I taped that into place to dry. While that dried, I prepared the coving and trim pieces.

I measured out each run of wall to see how long of trim pieces I needed, and wrote them on a piece of scratch paper. In the photo, you can see that I did not make the coving pieces a little longer than I needed them, and ended up having to make a couple more. When you measure the length you will need for each piece of coving, add a full extra inch. You will need this so you can cut the ends at an angle to meet nicely at the corners. Originally I prepared enough trim pieces needed to cover each seam between each 4” square of ceiling tile, but once I had the ceiling in place, I didn’t think that trim was needed, and thought it would detract from the overall look. I ended up just using the coving pieces and trim for the perimeter.


To make the trim pieces, I wrapped strips of flat aluminum around a piece of 12” long wood trim that was 1/8” wide by 1/16” thick. Again, it’s best to wear gloves for this. Then I slid the wood piece out, and with the rounded back of a spoon, I flattened out the edges. Now the trim pieces don’t have sharp edges. It’s a little tricky to keep these a uniform width, but using the wood piece as a guide is very helpful. I only needed one long trim piece for the front edge of my room, and a shorter one for the back archway between the kitchen and dining room, where the kitchen ceiling ends and dining room ceiling begins, to give it a finished look.

To make the coving that will angle between the wall and ceiling, I cut around the edge pattern of the cookie sheet, trying to leave about ¼” of smooth aluminum to the side of each long edge. Then I folded about 1/8” of the edges in, so they wouldn’t be sharp. I made as long of strips as I could, so I could cut the lengths I needed later. I chose the pattern bumps to face out, but you could do it the other way, depending on how you want it to look. Either way you choose, remember to be consistent. If the bumps will face out, then fold the edges away from the bumps. Run the edge of the back of your spoon along the edges to flatten them. Be careful not to flatten out your pattern bumps in the process. Now slightly bend the long edges in a curve, so your coving will have a slight ‘C’ shape against the point where wall meets ceiling. This is hard to explain, so I hope the pictures will help.

I glued the trim pieces and taped them in place with E6000 Glue. Then I held each piece of coving in place to determine the angle to cut the ends, so they would meet cleanly against the other pieces at the corners. I eyeballed this up, but I suppose there is an exact mathematical angle degree you can cut them at, I just don’t know what that would be. Notice how outside corner have to be cut at angles the opposite way that inside corners do. Again, I hope the pictures will help to explain this. I glued and taped the coving in place and let it all dry.

Then I punched out a circular form for the medallion to cover the ceiling light. I first punched out a 3/8” circle from a piece of smooth metal. I used another piece of aluminum sheet that I had on hand, but you can cut it from the corner of the cookie sheet. This is where you will find a big enough piece to work with. Then I eyed up the punched hole in the center of the 3/4” punch, to punch a larger circle around it.

I flattened three 15 mm silver three leaf bead caps with my fingers, which is easy to do, as they are very pliable. Then I broke off each leaf from them, by bending them until they snapped off, and glued seven of them in a circle pattern to the metal circle that I just punched out. You could probably improve on this design, by making your metal circle larger and adding more leaves to make it more intricate.


When all that was dry, I bent the whole thing into a slight bowl shape, and cut a slit in the medallion, so I could slip it around the light base. I glued it in place with E6000 glue and held it with masking tape overnight until dry.

When everything is finally dry, you can remove all the masking tape, and your ceiling is done.

I am thinking about using some of the leftover cookie sheet metal to make a tin backsplash to go above my counters in the kitchen. If I do, I will try to add pictures of it and my completed kitchen to my blog later.

I hope you enjoyed this tutorial. Please visit my Etsy shop, if you want to see more of my handmade dollhouse miniatures. I also sell some craft and miniature making supplies, and am adding new things all the time.

Happy miniature making!

-Margie

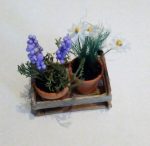
Miniature Dollhouse Potted Herb Plants in Wooden Crate Tutorial

This tutorial will tell you how you can make a 1:12 scale miniature pair of potted rosemary and chamomile plants in a wooden crate, like the one pictured here. I apologize in advance, because my pictures are not great. I know that, and I’m trying to improve, but tiny items are difficult to photograph clearly. Please remember that this is not a tutorial on taking great pictures. It most definitely is not.

Here is a list of things you will need:
– Polystyrene foam microbeads – smallest you can find like around 1 mm in diameter works best (like the kind used in floam). I found some on Etsy.
– Green jute twine (or natural color and you can paint it green). I found this at Dollar Tree.
– Green embroidery floss
– Reindeer moss (I found this at Dollar Tree too)
– White glue (like Elmers)
– Sawdust (I got some off my husband’s workroom floor)
– White tissue paper
– Approximately 1/4″ mini flower punch (I used the Mini Daisy punch by Punch Bunch)
– Acrylic craft paints in purple, yellow, black and brown
– Paper cups and plates
– Needle or straight pin
– Floral foam (optional)
– 5 1/2″ wood coffee stirrers with flat ends, not rounded, or you can cut the ends off flat (I got 1,000 of these on Amazon)
– Miniature pots (buy these or try to make your own if you are feeling extra crafty – here’s a tutorial to make cute ones out of paper – http://1inchminisbykris.blogspot.com/2010/04/paper-pottery.html). I also have the mini terracotta pots pictured available on my Etsy site.

To make the soil:
Put about 1/8 – 1/4 cup of sawdust in a small paper cup. Add a couple drops of black and brown paint and mix it thoroughly with a coffee stirrer or other wooden stick. You don’t want to make it too saturated, just color it all a nice dirt color. Then spread it out on a paper plate to dry.

To make the rosemary flowers:
Put a small handful of foam microbeads in a paper cup. Add a couple drops of purple paint and mix it thoroughly with a wooden stick. When all the beads are colored, spread them out on a paper plate to dry. While they dry, occasionally stir them so they don’t all clump together. These will be your flower buds.

Separate the strands of a 2″ piece of green embroidery floss. With your fingers, coat each strand with white glue and lay to dry on a piece of wax paper. Wipe your fingers frequently to they don’t stick to your fingers. Move them around so they don’t stick in place while they dry. They should end up kind of stiff, but not “globby” at all. These are your flower stems.

Coat about 1/4″ of the end of each flower stem with white glue. Then roll it around in the purple painted foam beads. Lay these aside to dry, or you can poke a hole with a pin in floral foam and stand them up to dry. Make several of these. When dry shake off any loose beads.

Pick through the reindeer moss to find the best pieces that are kind of sprawly and bushy – don’t know how to describe this, but look for the pieces that look most like rosemary foliage. Get about 3 or 4 good ones for each plant you want to make. Trim your flowers (3 look nice) to the desired height and add to the middle of the moss. Glue the whole bunch together at the base with white glue, squeezing together with your fingers. Let dry.

Thin some white glue with water to work with it easier. Smear the inside of your clay pot with the diluted white glue and fill with your newly made soil. Shake out the soil that doesn’t stick in the pot. Put another small glob of glue in the bottom of the pot and glue your flowers and foliage bunch in the middle. Put some more dabs of glue strategically around the arrangement, packing in soil up to the top of the pot. Let this dry.

To make the chamomile flowers:
Put about a dozen or so foam microbeads in a paper cup. You only need one for the center of each flower, so you don’t need many. Color them yellow and dry them in the same process you used above for the rosemary flowers.

Fold your tissue paper 3 layers thick and punch out daisy flowers. Poke a hole in the center of the 3 layer flower with a straight pin. Using the same stems you made above for the other flowers, push the stem barely through the hole in one flower, and secure in place with a dab of white glue. Moisten your finger and pick up just one yellow foam bead and press it onto the dab of glue in the center of your flower on the stem. Lay this aside or stick in floral foam to dry. Make several of these too.

For the chamomile foliage cut a 1 1/4″ piece of green jute twine. Hold the very end and separate and fray the rest of the length of twine, until you have a nice grassy looking clump. Make a few of these for each plant.

Use the same process above to make bunches of foliage and flowers and arrange them in the pot with soil.

To make the wooden crate:

Your dimensions may be different, depending on the size of the pots you use, so adjust accordingly. I pre-aged my wooden coffee stir sticks to give my crates a rustic look, but this is optional. Here are a couple nice tutorials on aging wood using the vinegar & steel wool method, but there are dozens out there if you look: https://www.lilblueboo.com/2014/04/how-to-antique-and-age-wood-instantly-for-a-weathered-look.html Or https://www.thenavagepatch.com/aging-wood-vinegar-steel-wool.

I have found it to be true that the older your vinegar/steel wool solution is, the darker your wood will be. The wood in my crates was treated with a solution aged 24 hours, and painted with black tea before the vinegar solution. It turned a lovely light grey. I tried the same method with the same solution 2 weeks later, and the wood turned a very dark brown.

From your wooden coffee stir sticks, cut 5 pieces 1 1/2″ long, and 4 pieces 7/8″ long. These cut really easily with a pair of scissors, but the end always goes flying off somewhere, and you need to go find it. I’ve lost many pieces in my carpet, which I find later with the vacuum cleaner. So, maybe try to cut them over a box or something.

Lay 3 of the longer pieces flat, horizontally, evenly spaced out to cover 7/8″ wide. Take two of the shorter pieces, and place them at either of the short ends, perpendicular to the bottom pieces, on top of the very ends of the bottom pieces. Glue them upright vertically in place with white glue, or if you have wood glue, use that, as it will work even better. Hold them up by sandwiching the whole thing between two small boxes, leaning the vertical pieces just barely against the supports to keep them vertical while they dry. When dry, take two of the longer pieces and glue them vertically along the longer sides, on top of the ends of the two short pieces you just glued. You are staggering them as you build up the sides of the box. Follow the picture as a guide. This isn’t how a real crate is made, because a real crate would have a vertical pieces of wood at each corner that you nail the horizontal sides to, and supports framing the bottom of the crate, but since we are working in miniature, you can skip the corner supports, and it still holds together, and more importantly, looks cute. Now glue your last two shorter pieces vertically upright along the shorter sides, on top of the ends of the longer pieces you glued and let dry. So the shorter ends each have two slats, the longer ends have one slat and the bottom has three slats when finished. Feel free to improve on this design, as I’m sure you can. Square toothpicks might be good to use for corner supports, if you want to make your crates look more detailed and realistic. You could also make tiny dots at the corners with a marker to resemble nail heads.

When everything is dry, place your two pots of flowers in your crate. Step back and admire your creation with pride.