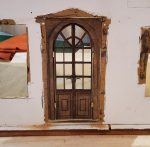
French style split arch wooden 1:12 scale door

I just have not found the time to do much with my Walmer dollhouse rebuild lately, but I did make some design decisions. I designed an impressive new front door to replace the mass-produced version I was going to use. I think it will give it more of a European flair. I used pictures of full-sized split arch French style doors to create a pattern. Then I had fellow Etsy seller ShedtoshelfBySean produce it for me. I really like how it turned out.

After some staining, gluing with clear plastic sandwiched between the doors for windowpanes, hinges, fancy door handles and a lot of cutting and sanding to make it fit, I finally got the door that I want. I plan to build a small overhang above the door to create a portico and make it more inviting.

I also practiced my stonework technique and decided on stone and mortar colors. The “stone” is made from torn pieces of paper egg carton. The pieces I used for practice are larger than what I will use on the exterior walls of the dollhouse. I glued the pieces to a painted piece of cardboard. Then I tried various colors and techniques for the stone and mortar. I’ve decided to go with the one on the left in the picture below. It is a custom blended mortar color, FolkArt chalk paint in the shade of Sheepskin (ugh, I don’t like the name) with a very watered-down wash of Rust-oleum Chalked Smoked Glaze. The stones next to them have a wash of Chalked Aged Glaze, but I like the gray look of the smoked better. I will finish with a sealer, but I haven’t decided between Mod Podge matte or a matte artist spray sealer yet. I’ll have to do a test to see which looks better.

I will be much more careful with the mortar color when I do the finished product, I was just being sloppy with my test because I got tired of trying different colors.

The other decision I made was to use split cedar shakes for the roof. I’ve been hemming and hawing over that because I wanted to do a metal roof, but I just don’t have any experience with that and am not confident that it would turn out well. I’d rather go with an “aged” wood shingle look, because I have worked with that before. I wasn’t really sure if cedar shakes are usually done on a mansard roof, but I found out it is fairly common. I found this picture, which is most likely the look I would get, except I could apply a grey wash to age it:

Then I saw THIS, and it really makes me want to go with the fish scale shingles. It also makes me want to add the extra ridge at the bottom so that I can add corbels. And this is why my project is taking so long…

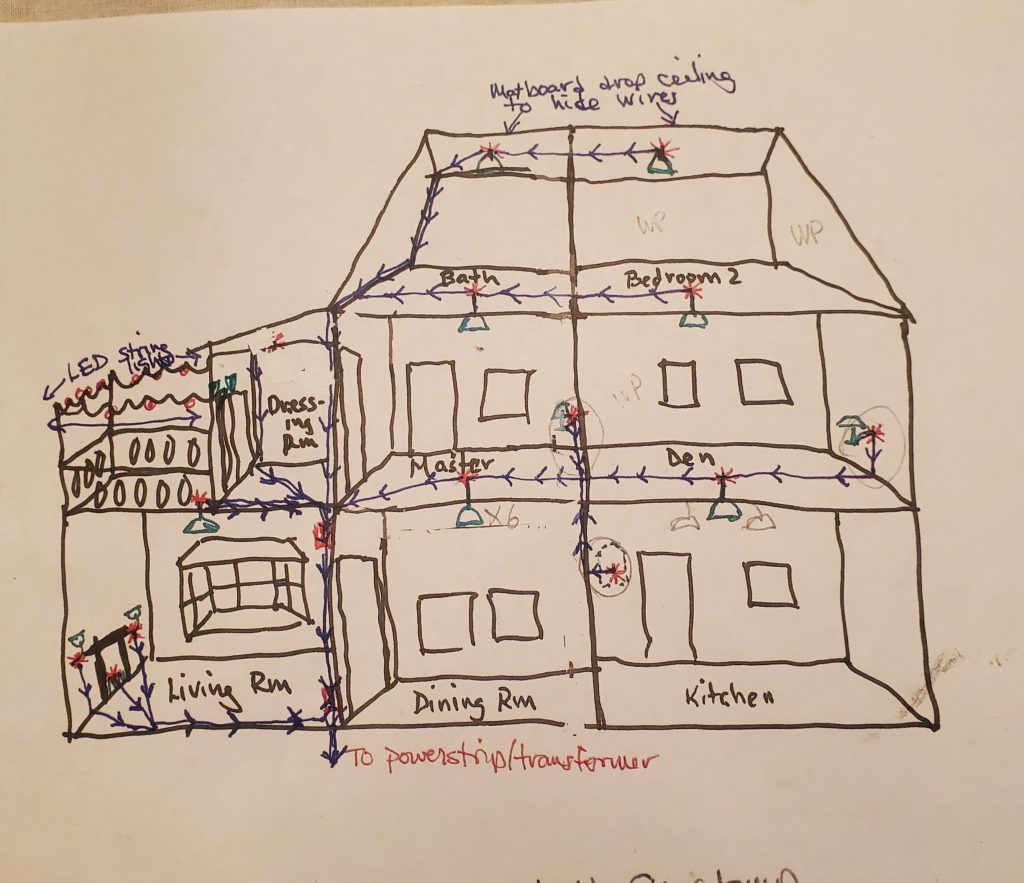
I really have to get busy with wiring, because it is holding up a lot of other processes. Below is my crazy wiring diagram, if you are interested. You can tell that I don’t have any hidden drawing talent. It probably only makes sense to me, because there is so much going on. The left addition will be wired separately from the right so the house can come apart. I want to make most of the light fixtures by hand. The red asterisks indicate where light fixtures will be. Most of the wires will be hidden by flooring or trim. I don’t want to use tape wire and with 3V LEDs I don’t have to. The wires needed are a very fine gauge so should be easy to hide.
More to come, but I can’t really promise soon – unless I win the lottery or something.

Take care! – Margie

Dollhouse upcycle project: Making 1:12 scale fancy bowls from discarded plastic spout rings

With a little effort and a few items, you can make these lovely porcelain-look bowls for your dollhouse. They will add such a realistic designer touch to a miniature China hutch, plate rail or dining room table.

What you will need:

  • Images of China plate patterns shrunk down to 1″ in diameter and printed on regular printer paper. The kind that has an outer boarder and center circle design with a band of white between them, not a pattern all-over
  • White or cream colored acrylic paint and a small paintbrush
  • Plastic ring tabs that are removed from a cardboard carton of coffee creamer or similar container
  • Sharp scissors for small detail work
  • Craft blade (optional)
  • White or tacky glue
  • Sandpaper or emery board
  • 1″ & 3/4″ circle hole punches (optional, but nice to have)
  • Gloss mod podge or clear glaze

First you need to prep the plastic rings by cutting the “bowl” part away from the ring. Carefully use a craft blade if you don’t want to dull your good scissors. Cut as close to the rim of the bowl as you can and then sand smooth any remaining bump left. If your plastic doo-hickey is like mine, there may be raised numbers on the bottom but these won’t show when you are done. You can try to sand them down too if they bother you. Then set the bowl level on your sandpaper or emery board and sand a flat spot on the base, so you bowl will sit level.

Next paint your bowl white or cream (whichever looks best with the plate pattern you have chosen). Give it 2 – 3 coats on the bottom and top, letting dry on each side before turning to paint the other.

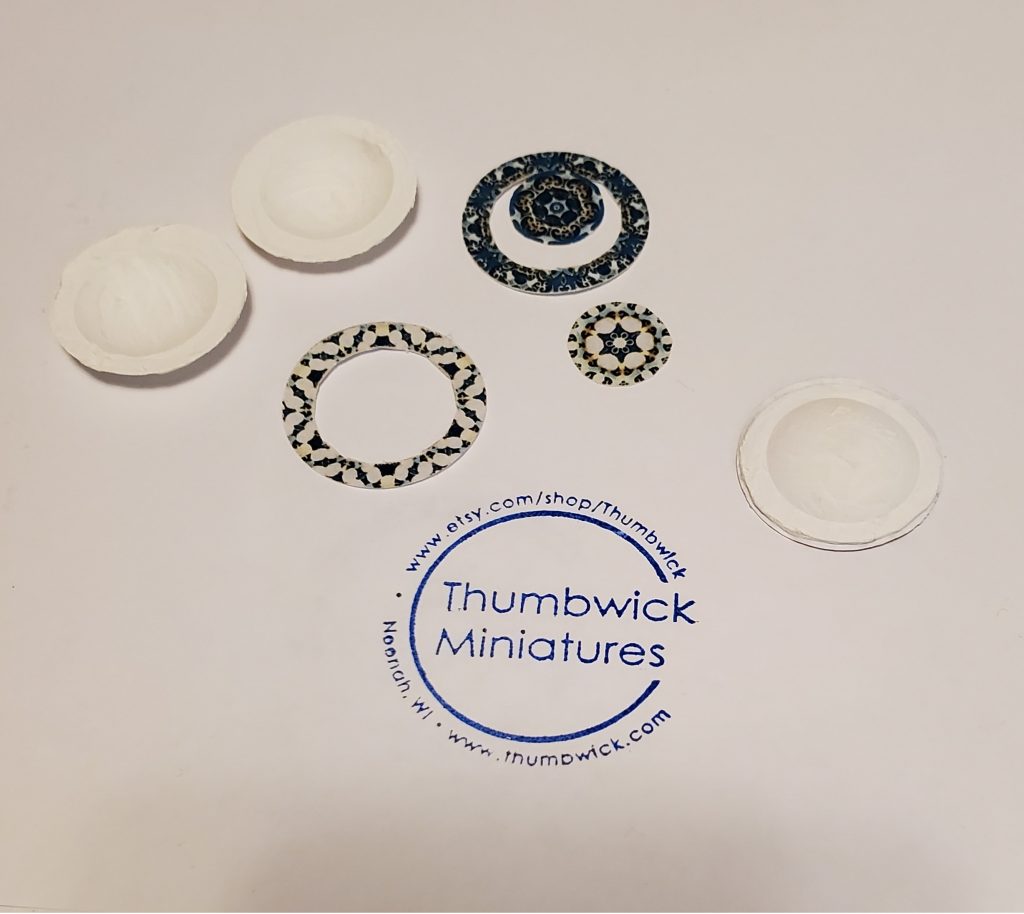
Now use your 3/4″ circle punch or scissors to carefully cut between the outer China plate pattern boarder and the center round pattern. Trim the center round pieces up to the pattern and set them aside for now. Use a 1″ circle punch to cut out the outer boarder patterns, or cut freehand with scissors, and trim the inner edge of the border up to the pattern. If you understood my explanation you should be left with outer circle shapes of the pattern with empty centers and inner circle shapes of the pattern. These will be glued to the painted plastic bowls. If you try to glue them without cutting the center and outer patterns apart and removing the white space between, you will end up with wrinkles, which you don’t want.

Spread a thin layer of glue on the back side of the center plate pattern and press it in the center of the bottom of the bowl. You will have a little time to move it slightly until it looks centered. Press it evenly into the curved shape in the bottom being careful to not make any wrinkles. Spread a thin layer of glue onto the back of the outer plate pattern ring and press it onto the rim of the bowl. The rim may not be exactly round, so eyeball the pattern ring up until it looks evenly spaced around the center pattern. This means it may hang slightly over the side of the plastic bowl in some spots. You can fill this underneath ridge in with gloss mod podge or clear glaze at the end so don’t worry about it. It’s much better to get it all centered correctly than to match the edges of the bowl, because you will mostly be looking at the front of the bowl, not the underside.

When you pattern is dry you can seal the whole dish with gloss mod podge or glaze using several coats on the bottom and top, leaving it just a little thicker on the underneath edges that are hanging over the bowl to even it up. Paint 2 – 3 coats on the bottom and top, letting dry on each side before turning to paint the other.

Make a whole set of matching bowls or make different coordinating patterns to go on a shelf together. You might want to make matching plates to go with the bowls. When making plates you won’t need to worry about wrinkles, so you don’t have to cut the centers out, just use something that is 1″/25mm across as a base. I haven’t tried it, but I have heard that you can make miniature plates out of the base of egg carton cups, so do a search on that technique if your goal is to upcycle (aka turn trash into treasure). And I think that is a very worthy goal, which is why I wrote this tutorial to begin with.

Have fun with it, improve on it and keep nurturing your tiny obsession, my friends!